Bun: A Great JavaScript Runtime for Data Practitioners
An example of what we’ll be discussing in this article

If like me you’re doing your best to keep up with the tech industry in general, you’ve probably noticed that web development has become incredibly complex and difficult to follow over the past 6 to 7 years. Not many people seem to write vanilla JavaScript anymore, and navigating through the various existing runtimes (Node, Deno) or frontend frameworks (React, Vue, etc..) can quickly feel overwhelming.
To give you a better idea of how confusing the whole JS ecosystem can be for anybody who’s not a web developer, just try and keep a mental count of all the libraries that you have never heard of but that still made it to the 2022 State of JS tier-list:
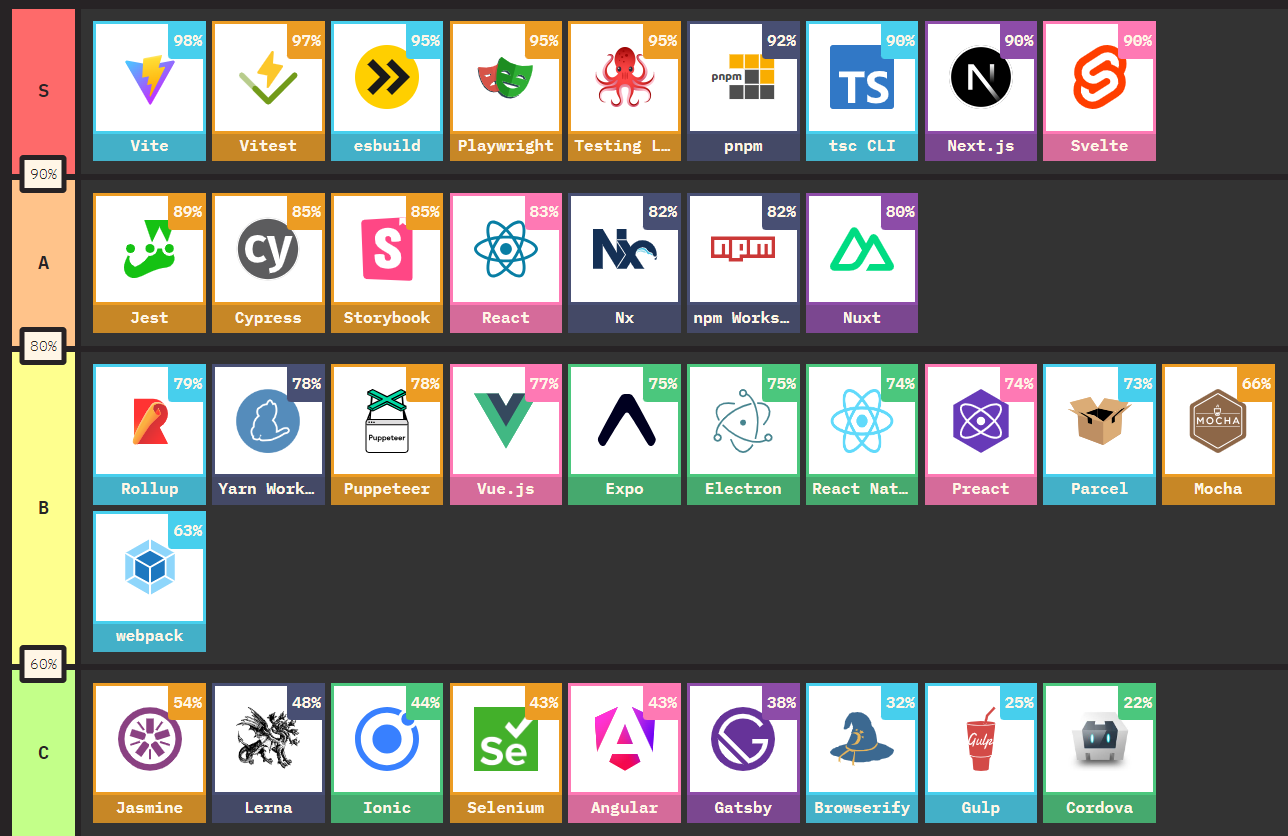
Now the good news is, if you’ve been following this website, chances are that you are a data practitioner of some sort. And if that’s the case then this hellish situation is all but a distant distraction for you.
At this point you might be wondering why you should care about web development in the first place, and even more so why you’d want to learn JavaScript and pick up any of the aforementioned frameworks? Well let’s be honest: you actually don’t have to. As a matter of fact, you’ll be able to easily replicate in Python everything that we’re going to go through in this article, using Django, Flask, PyScript or more recently FastUI.
You see I’m not a web developer myself, but I do believe that whether you are a data analyst, a data scientist, or a data engineer, becoming at least comfortable with JavaScript, HTML, and CSS can be extremely beneficial.
First of all, JavaScript undoubtedly offers the best solutions when it comes to data visualisation. Period. Yeah I know, you’ve already heard the same story about pretty much any programming language under the sun. Whoever’s involved in the R / Python / Julia community will probably tell you as much. The difference this time is that in the case of JavaScript, this statement is actually true: nothing will ever beat d3.js.
But more importantly and this time whether you like it or not, your whole world as a data practitioner revolves around some combination of web-based technology. The tools you use everyday, such as Jupyter, Streamlit, or Superset all work in your browser. Your favourite plotting libraries, such as Plotly and Bokeh all utilise JavaScript as their backend charting engine.
I’m not saying that you should switch careers and become a web developer. But you should know enough to be able to comfortably play around with basic web pages and quickly spin up a web server if needed.
While the purpose of this article isn’t to provide a full course on this new and shiny runtime named Bun, we’re going to see why I think it is a perfect fit for people like us who work within the data science / analytics field and who are looking for something simple and yet powerful.
Bun.js, a real cakewalk
So what is Bun and how different is it from Node?
“Develop, test, run, and bundle JavaScript & TypeScript projects—all with Bun. Bun is an all-in-one JavaScript runtime & toolkit designed for speed, complete with a bundler, test runner, and Node.js-compatible package manager.”
Installing Bun can be done in several ways, but for this article I chose to rely on the popular NPM package manager as it’s already installed on most of my devices:
npm install -g bun
Then simply create a folder that you’ll name as you want to, and type:
bun init
You’ll be asked a few questions, just like when initialising a new project with Node. Pay attention to the main file that you want to run, which should have either a .js or .tsx extension depending on whether you intend to use JavaScript or TypeScript.
First thing you may have noticed: Bun supports TypeScript straight out the box, and so you won’t need to install anything else. Sweet.
Next we can simply run the example provided in the official documentation:
const server = Bun.serve(

    {

        port: 3000,

        fetch(req,server) {

            return new Response(`This article about Bun.js is live on ${req.url}`)

        }

    }

)

console.log(`Listening on port: ${server.port}`)
Now type either bun run index.js or even better bun --watch run index.js (the --watch acts a bit like Nodemon does for Node) to generate your server. Head over to http://localhost:3000/ and you should hopefully see something close to this:

Last important thing for us today, working with an already existing html page is pretty straightforward. Well of course, we obviously need a simple html file first:
<!DOCTYPE html>

<html lang="en">

  <head>

    <meta charset="UTF-8">

    <meta name="viewport" content="width=device-width, initial-scale=1.0">

    <meta http-equiv="X-UA-Compatible" content="ie=edge">

    <title>Intro to Bun.js</title>

    <link rel="stylesheet" href="https://unpkg.com/mvp.css">

  </head>

  <body>

    <main>

      <h1>Homepage</h1>

      <br>

      <form>

        <label>Enter your text here</label>

        <textarea rows="1" cols="80" id="inputBox"></textarea>

        <label>Get your results here</label>

        <textarea rows="1" cols="80" id="outputBox"></textarea>

        <button type="button" id="processButton">Process</button>

        <button type="button" id="clearButton">Clear</button>

      </form>

      <br>


    </main>

    <script>

	Paste here the JavaScript code that you'll find just below!

    </script>

  </body>

</html>
Within the pair of <script></script> tags that we have left empty, we can even add a bit of vanilla JavaScript and throw in a couple of event listeners to make the two <button> elements respond to our clicks:
<script>

  let userClick = document.getElementById("processButton");

  let userClear = document.getElementById("clearButton");


  const parseText = () => {

    let userInput = document.getElementById("inputBox");

    let userOutput = document.getElementById("outputBox");

    userOutput.innerHTML = userInput.value;

  }


  const clearText = () => {

    let userInput = document.getElementById("inputBox");

    let userOutput = document.getElementById("outputBox");

    userInput.value = "";

    userOutput.innerHTML = "";

  }


  userClick.addEventListener("click", parseText);

  userClear.addEventListener("click",clearText);

</script>
As you might have noticed, we’ve used a minimalist CSS framework named MVP.css which I already covered a while ago in this article.
Back to our server, let’s modify our index.ts (or index.js) file, and tell Bun.js to serve our webpage as an html file this time:
const homePage = await Bun.file("./home.html").text();


const server = Bun.serve(

    {

        port: 3000,

        fetch(req,server) {

            return new Response(

                homePage,

                {

		            headers: {

		                "Content-type": "text/html"

		                }

		        }

            )

        }

    }

)

console.log(`Listening on port: ${server.port}`)
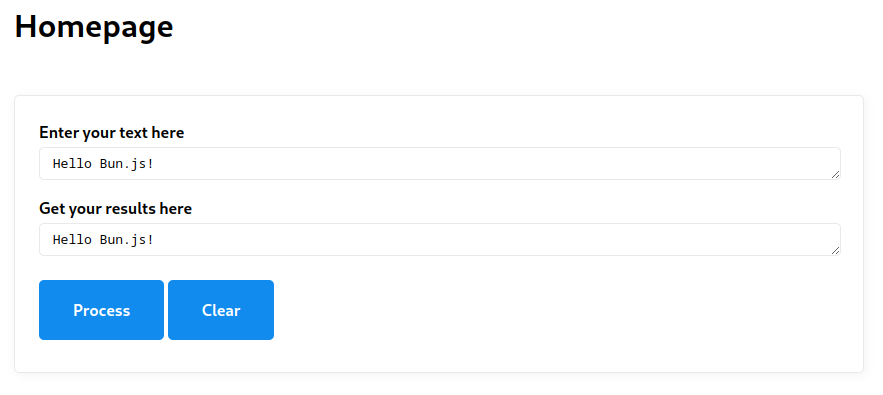
There we go!
Again, this article really isn’t a full tutorial on how to use Bun.js for web development. To build bigger websites, you’ll for instance have to use either one or a combination of the following tools:
There are tons of tutorials that will show you how to work with any of these frameworks. If you want to know more, the following videos and articles do a pretty good job at helping you get started with the above tools:
- Getting started with Bun and React
- Elysia: A Bun-first Web Framework
- Bun, ElysiaJS, HTMX getting started step-by-step tutorial
Instead, we’re going to focus on a couple more features that I think make Bun particularly interesting for a more data-focused audience.
B for Bun and for Bash
As mentioned earlier, we’re data people, not web developers. And as such, there’s a lot that we can do using some basic UNIX commands. I’m not just talking about typing jupyter notebook into your command prompt, and if you want to know more about all the great things that you can do using a command-line interpreter while also looking like the coolest kid in town, I highly recommend you read this book called Data Science at the Command Line:
Now it is of course possible to run UNIX commands using a variety of obscure NPM packages. After all, if you can think of it it must exist somewhere on NPM. That being said, the reality is that most of these packages probably aren’t super user-friendly and very likely not well-maintained.
Well guess what, Bun.js’s supports most of your common UNIX commands, such as ls, cat, etc.. Plus a ton of other stuff. All you have to do is import the Bun Shell. We can even save the output of any command we run to a file!
import { $ } from "bun";


await $`ls > files.txt`;
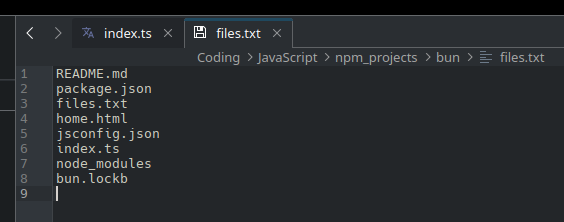
Now as we’re data practitioners, our best friend is without a doubt the column command. Let’s save a csv file into our bun folder and write the following code:
import { $ } from "bun";


await $`column -s "," -t fake_csv.csv | grep engineer | head`;

Here’s a breakdown a what we just did:
-s ","means that our csv file is comma-separated- use
-tto specify that you want to display the output in tabular format | grepis one of the most powerful ways to search for any text pattern you may think of- and finally
| headspecifies that we want the first 10 results
This is pretty much the equivalent of a SELECT * FROM fake_csv WHERE Occupation LIKE '*engineer*' LIMIT 10 in SQL.
Now you may wonder, why do we need this? Well, the Bun Shell works the same regardless of what operating system you are using. Yes, that’s right, we can now run UNIX commands on a Windows device!
Still not convinced? What if I told you that Bun.js will also allow you to run both AWK and Sed commands? Let’s try this out:
await $`cat fake_csv.csv | awk -F, '{print $4","$5}' | sort | uniq | head`;
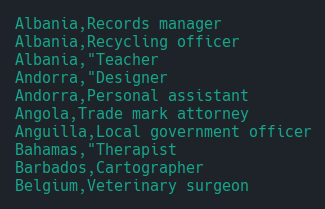
Not bad, right?
Built-in support for SQLite
If you’ve been dabbling with JavaScript frameworks for a while, you know how much of a pain trying to query a SQL database can be. There are tons of available packages, most of them promising more than they actually deliver, all poorly documented, etc..
Meanwhile, Bun ships with a built-in extension for interacting with SQLite databases! All we have to do this time is import the bun:sqlite module:
import {Database} from "bun:sqlite";


const db = new Database("weather.db");
Where weather.db is a SQLite database that we built in a previous article. If that database doesn’t exist at the root of your project folder, it will be automatically created. You can then run any SQLite-supported DDL and DML commands such as CREATE TABLE or INSERT INTO using the .run() method.
As we already have our own database, we’re instead going to see how we can easily query some data using .query() this time:
const query = db.query("SELECT * FROM forecast LIMIT 10");


console.log(query.all());
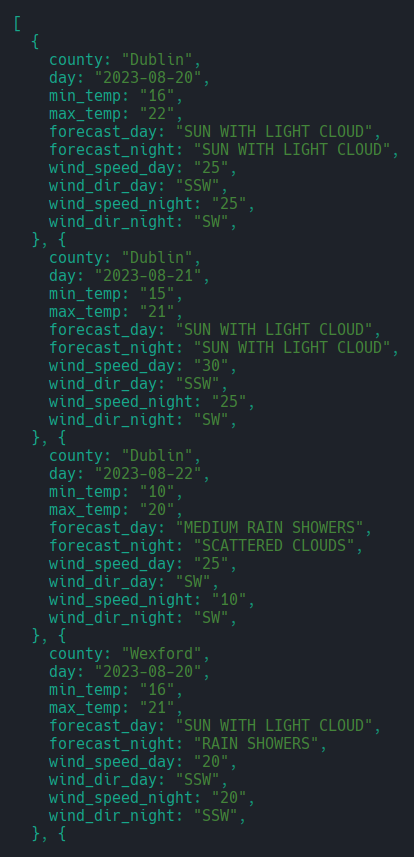
Using .all() we get an array of objects, but Bun.js offers several other methods that slightly modify the type of output that is returned:
- use
.get()if you want the first row only - use
.values()to obtain an array of arrays
To make the output of our query a bit easier to read, we might want to use Arquero, a very good JavaScript package for manipulating tabular data and that we previously discussed in previous article.
But before we do that, we’re going to have to write a small function that transforms the output of .query().all() into a format that Arquero can ingest:
import {Database} from "bun:sqlite";

import * as aq from "arquero";


const db = new Database("weather.db");


type ParsedQuery = {[key: string]: string[]};


const parseQuery = (data: string): ParsedQuery => {

    const query = db.query(data).values();

    let queryContainer: ParsedQuery = {

        "County": [],

        "Day": [],

        "Min_temp": [],

        "Max_temp": [],

        "Forecast_day": [],

        "Forecast_night": [],

        "Wind_speed_day": [],

        "Wind_dir_day": [],

        "Wind_speed_night": [],

        "Wind_dir_night": [],

    }


    for (let q of query) {

        queryContainer["County"].push(q[0]);

        queryContainer["Day"].push(q[1]);

        queryContainer["Min_temp"].push(q[2]);

        queryContainer["Max_temp"].push(q[3]);

        queryContainer["Forecast_day"].push(q[4]);

        queryContainer["Forecast_night"].push(q[5]);

        queryContainer["Wind_speed_day"].push(q[6]);

        queryContainer["Wind_dir_day"].push(q[7]);

        queryContainer["Wind_speed_night"].push(q[8]);

        queryContainer["Wind_dir_night"].push(q[9]);

    }

    return queryContainer;

}


const getDataFrame = (data: ParsedQuery): any => {

    const dframe = aq.table(data);

    dframe.print();

}


const parsed_query: ParsedQuery = parseQuery("SELECT * FROM forecast LIMIT 10");

getDataFrame(parsed_query);

If we hit bun run index.ts in our terminal, we get this and much easier-to-read data table.
Arquero is also capable of transforming a dataframe into an HTML table, which we can then visualise in a web browser. All we have to do is slightly amend the simple script that we had written earlier when creating our first server.
Please note that I’ve dumped all my functions into this same index.ts file that we’ve been working on from the begining of this article Ideally though, we’ll want to create a separate file named data_wranggling.ts for our parseQuery() function and add the following line to the top of our index.ts file: import {parseQuery} from "./data_wranggling.ts".
import {Database} from "bun:sqlite";

import * as aq from "arquero";


const db = new Database("weather.sqlite");


type ParsedQuery = {[key: string]: string[]};


const parseQuery = (data: string): ParsedQuery => {

    const query = db.query(data).values();

    let queryContainer: ParsedQuery = {

        "County": [],

        "Day": [],

        "Min_temp": [],

        "Max_temp": [],

        "Forecast_day": [],

        "Forecast_night": [],

        "Wind_speed_day": [],

        "Wind_dir_day": [],

        "Wind_speed_night": [],

        "Wind_dir_night": [],

    }


    for (let q of query) {

        queryContainer["County"].push(q[0]);

        queryContainer["Day"].push(q[1]);

        queryContainer["Min_temp"].push(q[2]);

        queryContainer["Max_temp"].push(q[3]);

        queryContainer["Forecast_day"].push(q[4]);

        queryContainer["Forecast_night"].push(q[5]);

        queryContainer["Wind_speed_day"].push(q[6]);

        queryContainer["Wind_dir_day"].push(q[7]);

        queryContainer["Wind_speed_night"].push(q[8]);

        queryContainer["Wind_dir_night"].push(q[9]);

    }

    return queryContainer;

}


const server = Bun.serve({

    fetch(req) {

        const parsed_query: ParsedQuery = parseQuery("SELECT * FROM forecast LIMIT 40");

        const df = aq.table(parsed_query).toHTML();

        return new Response(`<h1>Weather data</h1><br><div>${df}</div>`, {

            headers: {

                "Content-Type": "text/html",

            },

        });

    },

  });
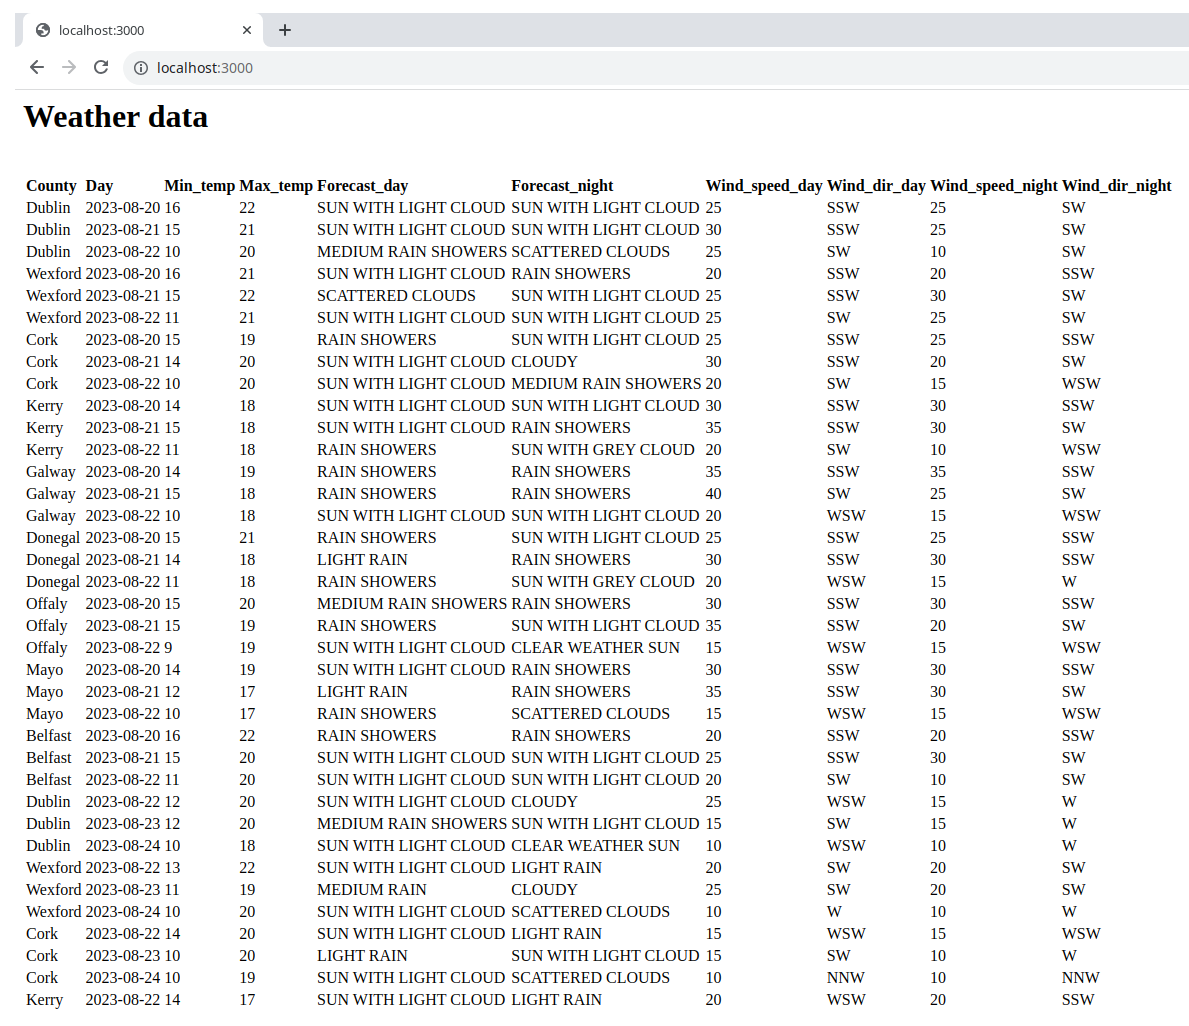
The perfect framework for data-focused projects
Now of course what we just did looked terrible, but you should get an idea of what we could do next using React or any other framework you feel comfortable using.
For instance I think Bun.js would be a perfect fit for building an in-browser SQL database exploring tool, with some data-practioner centered features, such as report-generation and plotting capacities. A more lightweight version of Apache Superset if that makes sense.
I’ve seen a few of these tools pop up over the past few months, such as Evidence. If you’ve developed an open-souce BI platform and want to share it with me, just hit me up on LinkedIn.
Meanwhile, I hope you’ve enjoyed this article and will give Bun.js a chance!